
There are two things that I want to point out. See the orange and purple
swaths? These are the “In Dev” and “In QA” flows. As long as these stay
relatively thin, we are doing a good job of minimizing WIP.
The second thing that I absolutely
love about this chart (and that makes my P.O.s and Devs
think I’m super sneaky)? It takes a snapshot each day. I knows the number of
tickets in or out. See how the top edge climbs as the
sprint goes on. This means tickets have been pulled in.
This morning during Scrum, I pointed out that in less than a week we had pulled in a ton of tickets, and I was quickly hit with, "Most of those are Translation Tasks." Well the team doesn't work on Translation Tasks, those are mostly for Product to Track so we can plan launch dates. So, why were they cluttering up the Task Board and skewing the Cumulative Flow Chart's data? Time to fix this!
So I set out to find the answers. I found out from the GreenHopper Confluence page that I could configure which Context I wanted to pull from. Genius!
So I went into the Planning Board to set up a new context. (You can do this in any of the default Agile Boards: Planning, Task, Chart, and Released.) To do this (a) click the arrow to the right of whichever context you are currently set to (probably either "Default" or "On The Fly") and (b) click "New".

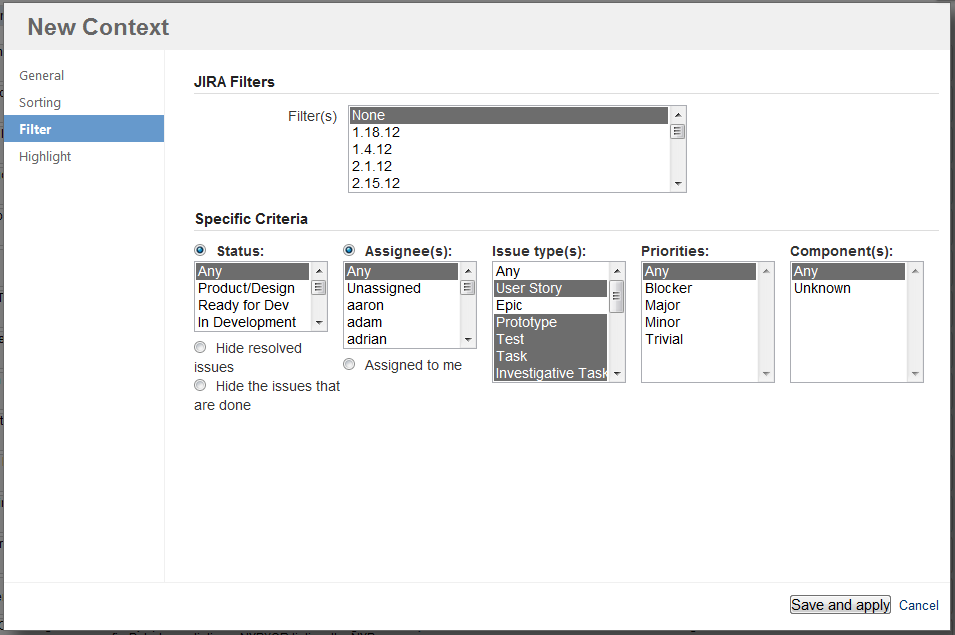
A dialog box will come up so you can configure your new Context. First Name it, then click over to the Filter tab and choose which issue types to include/exclude. I decided to exclude Epics, Content/Marketing Tasks, Design Tasks, and Translation Tasks. Since most of these are custom to us, yours will probably be different.
Then pop back over to the dashboard that you have the Cumulative Flow Chart Gadget on, and click "Edit" to configure. Set the "Context".

Now I have a much cleaner view to see if tickets were added, and can address them accordingly!
 |
| After |
|
| Before |


