In the beginning there were 5 tickets...
Translation is a way of life for most companies, but dealing with the translation workflow can be a giant PITA! We were no different. We created a sub-task type called "Translation Task", and for each ticket that required translation we made a separate Translation sub-task. This process became even more fun when changes were made or the sub-tasks themselves required translations, so links had to be created, and on and on and on...This was A LOT of work for the ticket creator and we knew it wasn't scale-able as we were about to add three new languages.


We needed a change!
I came up with a plan to get all of the translation requirements on one ticket with a series of custom fields and a new screen scheme for Translation Tasks. Here's what the screen looks like:
Each language has it's own drop-down with the options "Needed", "Not Needed" or "Done". When the ticket is created those are set to "Needed" or "Not Needed" and the Due Date is set.
Translator Visibility
I set up a dashboard for the Translators that had each of their languages broken out in a Filter Results Gadget. The filter looks for any tickets with "Needed" in their language then sorts by due date.
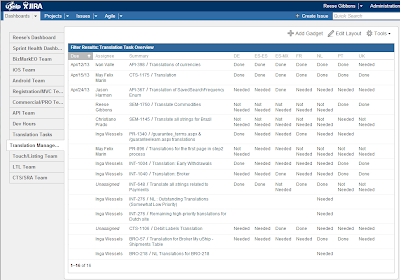
Our Translation Manager needed a view to keep track of all projects that were in the queue that included all languages. So I created a separate dashboard for her that filtered for all open translation tasks. (Note: I created this dashboard before JIRA allowed for column order to be sorted in the Filter Results Gadget. If you are earlier than 5.2 you can use this workaround to set that https://confluence.atlassian.com/display/JIRAKB/Setting+Column+Order+in+Filter+Results+Gadget)
When the translators are done, they simply edit the ticket and change their language to "Done". It shows up for the translation manager, and when all needed languages are completed, the ticket is sent back to the ticket creator for validation. Easy peasy :)